Installation in Dynamics CRM
Before installing the solution in Dynamics CRM it is recommended that you configure Azure Active Directory. Often this step takes time as other people with the appropriate access to AAD needs to be ionvolved and you should get that ball running as soon as possible :-)
It is assumed that you have experience with Dynamics CRM configuration and know how to import and create solutions. If not, you need to call a friend.
Steps
- Download the most recent managed PowerBIViewer release.
- Import it into your Dynamics CRM instance.
-
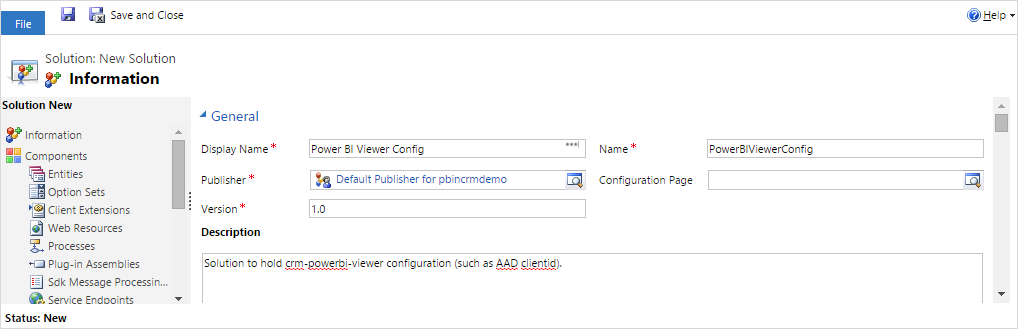
Next you need to create a solution to hold the configuration. You can of course also use any existing unamanged solution you already have on the instance.
-
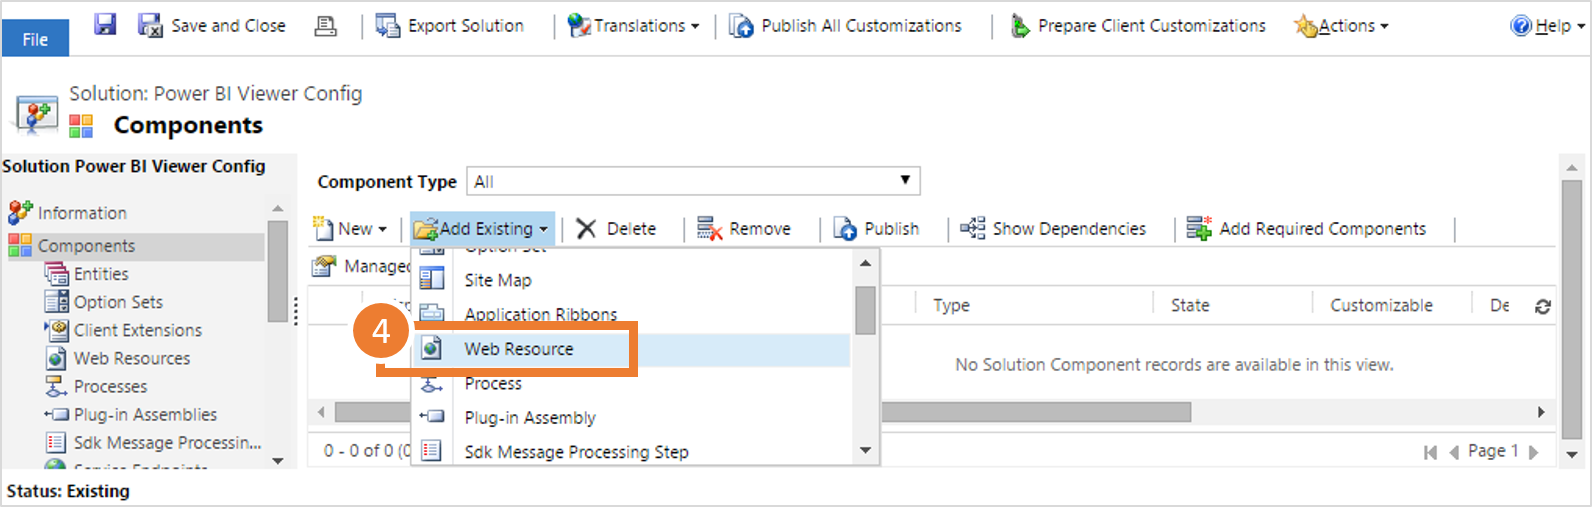
Get the configuration template by adding the existing configuration web resource from the crm-powerbi-viewer solution.
-
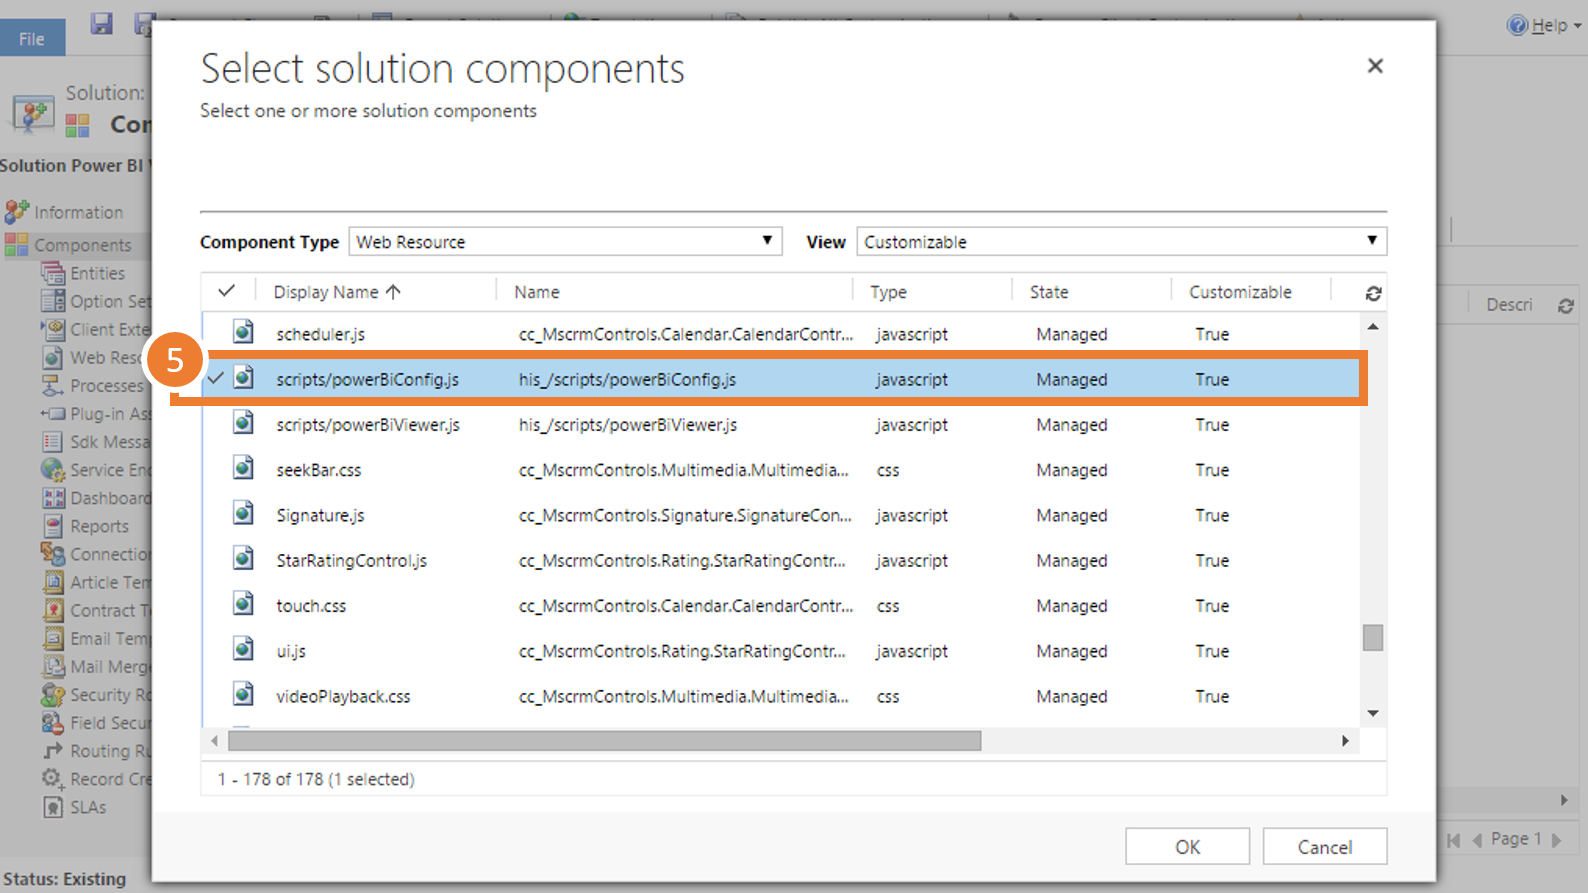
Find, select and add the resource named:
his_/scripts/powerBiConfig.js
-
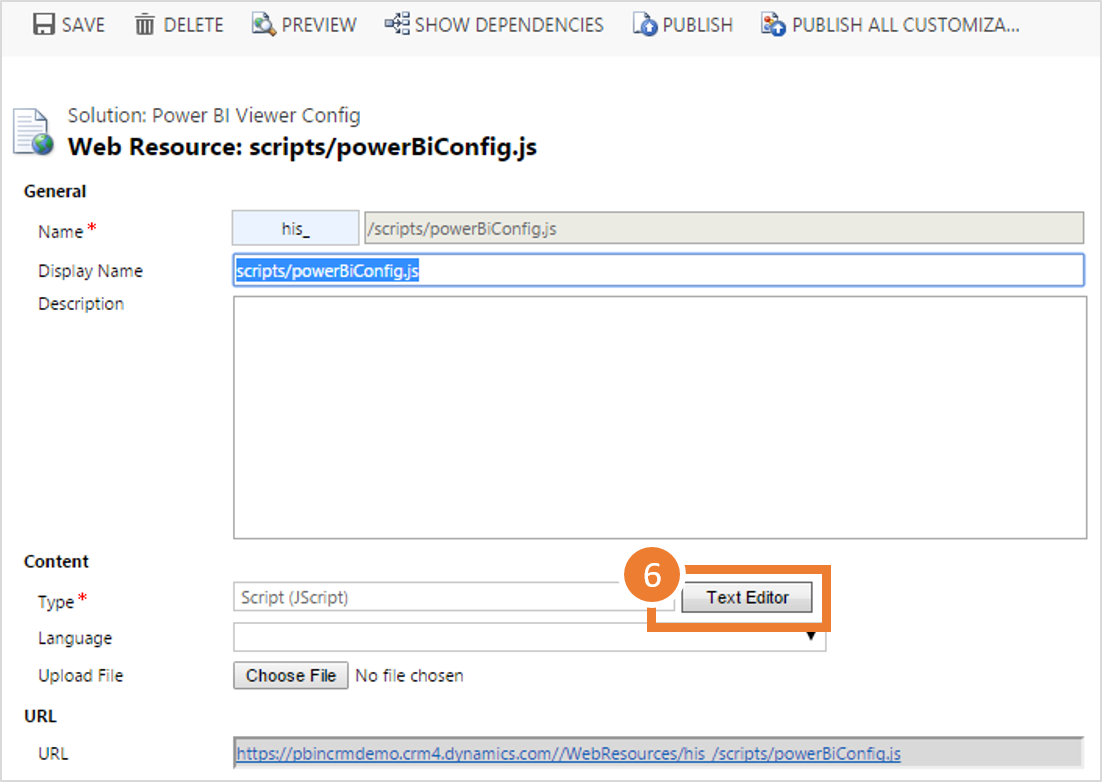
Open the resource and edit its contents by clicking the button [Text Editor]
-
Find the line with the client id and do the following two steps:
- replace the text <Get Client Id from Azure AD> qith your client id (the one you copied when configuring Azure AD).
- remove the two // at the beginning og the line you just edited.
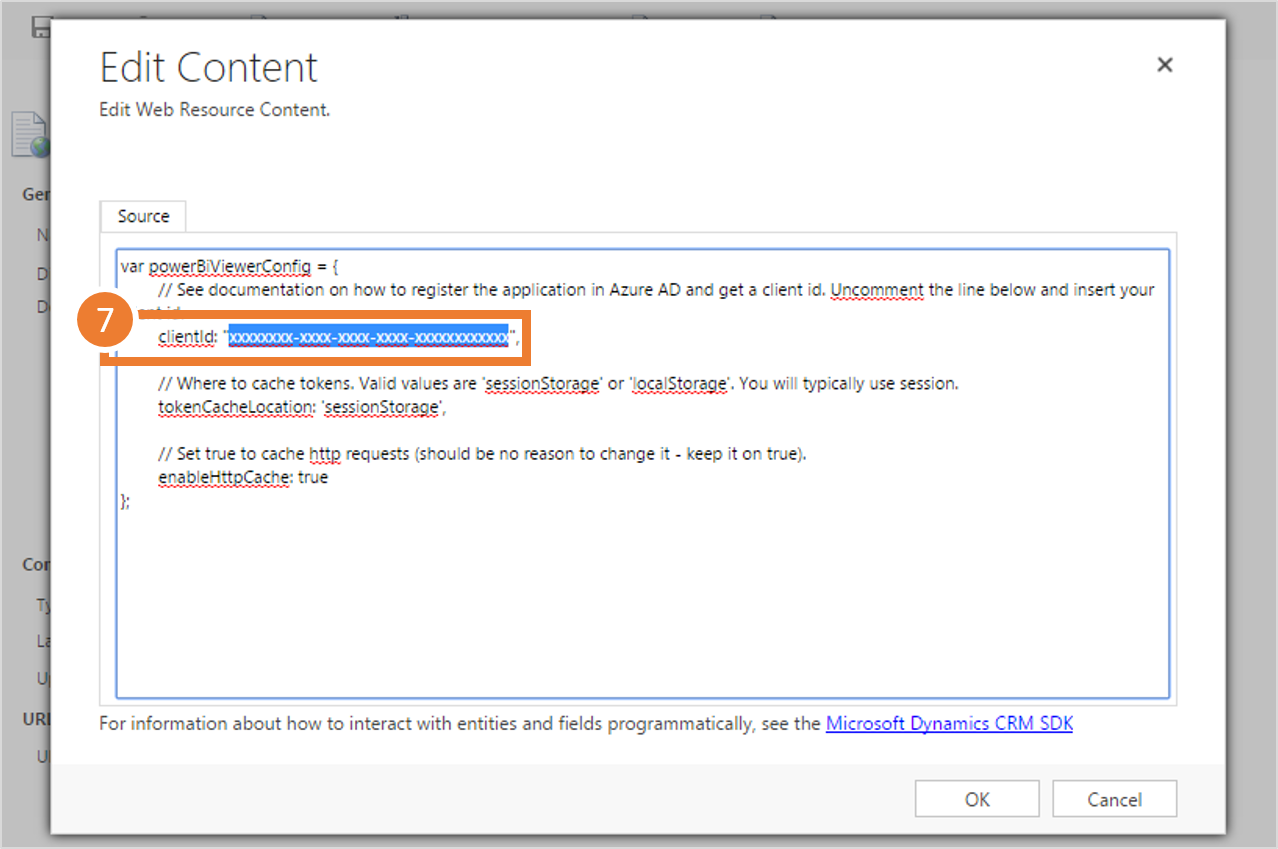
-
The final config should look similar to the picture above but with the x’s replaced with your client id.
- All done here. You are now ready to add a Power BI report or add a dashboard tile to a CRM dashboard or form.