Azure AD using simplified flow by Power BI
To be able to authenticate with Power BI a token is required. The token is delivered by Azure AD and to get it crm-powerbi-viewer must be registered as a valid application.
Power BI Simplified Flow
The Power BI team has created a schema that simplifies the creation of an application in Azure AD. You still need to perform a few steps in the Azure portal but the flow is easier with fewer steps.
If you encounter issues following this flow - please validate the created application using the original guide making sure that all values are set as described in that guide.
Steps
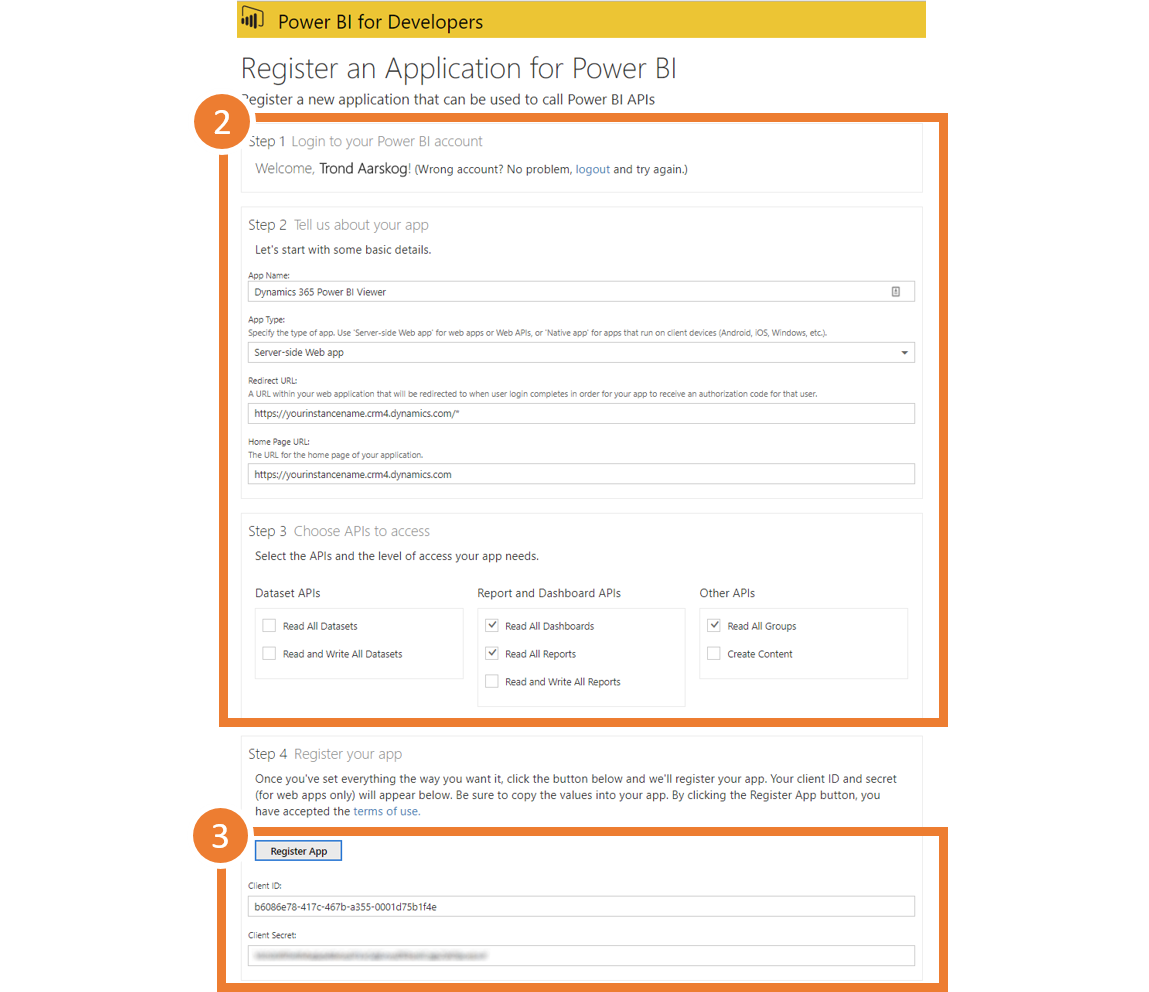
- Go to the Power BI App Registration Tool.
- Follow all the steps to register the app
-
Click [Register App] and copy the client id (you will need it later).
The Power BI team is currently adjusting the list of permissions. The simplified flow does not always include all relevant permissions. Thus you may need to visit the original guide step #13-15 to verify the list of permissions you need to set.
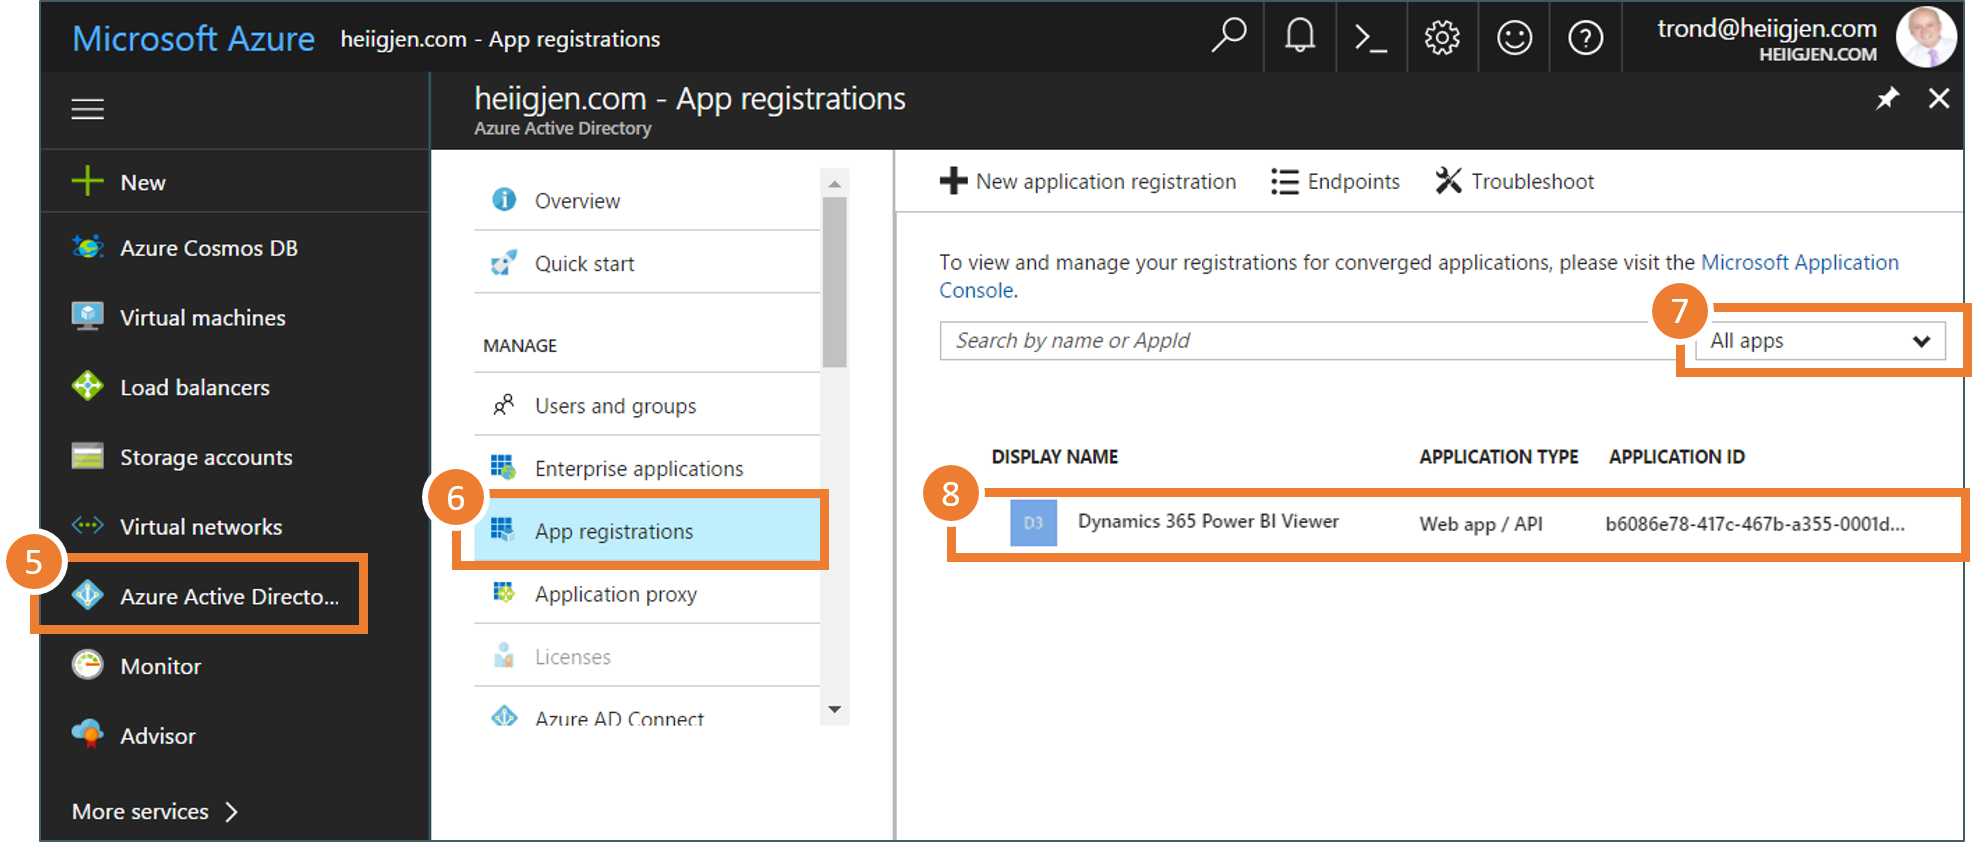
- Go to the Azure portal.
- Navigate to your Active Directory.
- Then to App Registrations
- Show all apps
-
Open the newly registered app
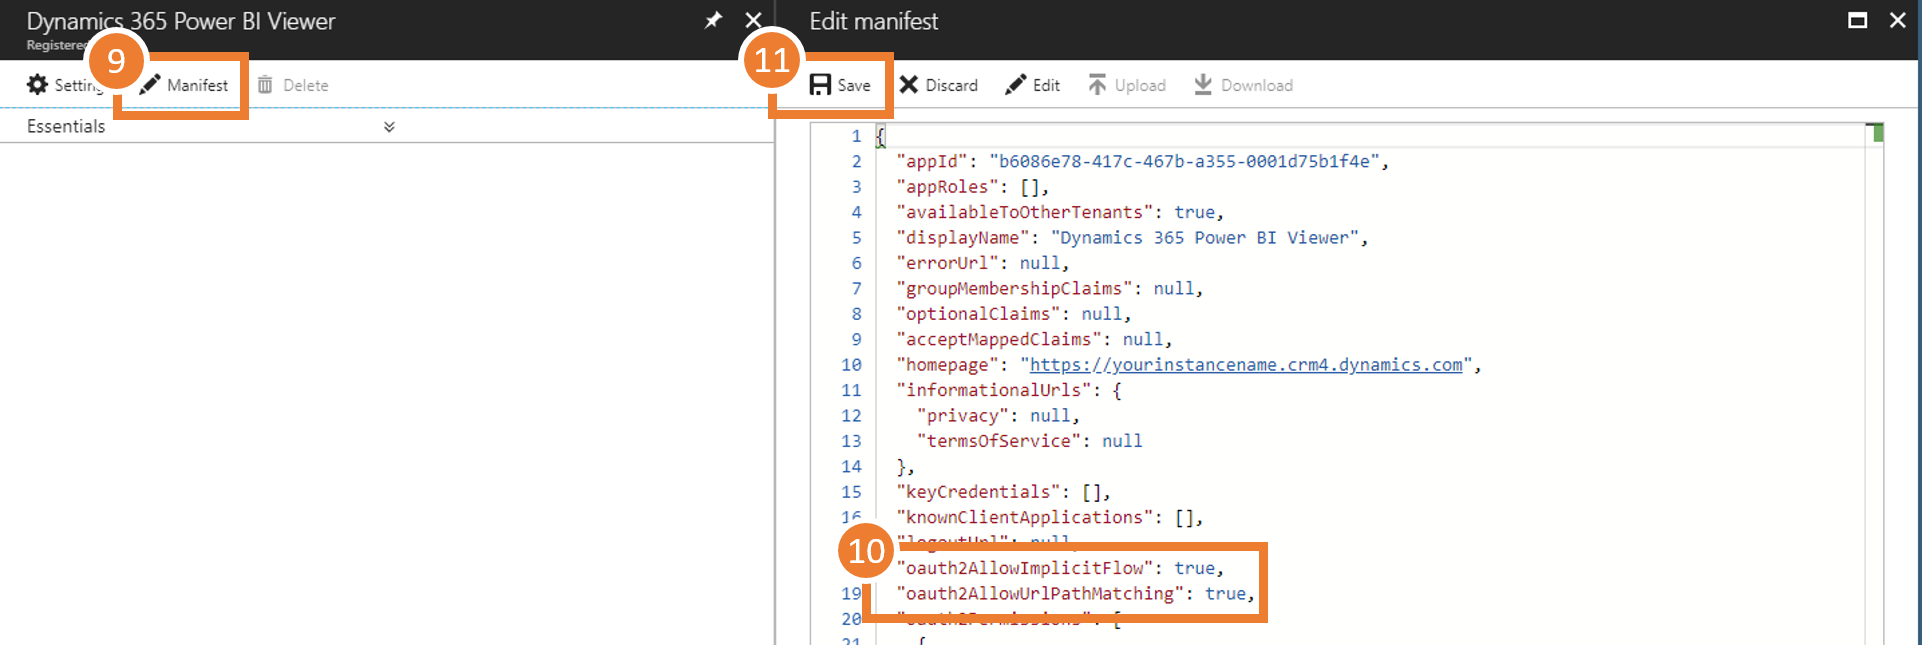
- Two changes to the manifest are required
-
Change the following from false to true:
"oauth2AllowImplicitFlow": true, "oauth2AllowUrlPathMatching": true, -
And save.
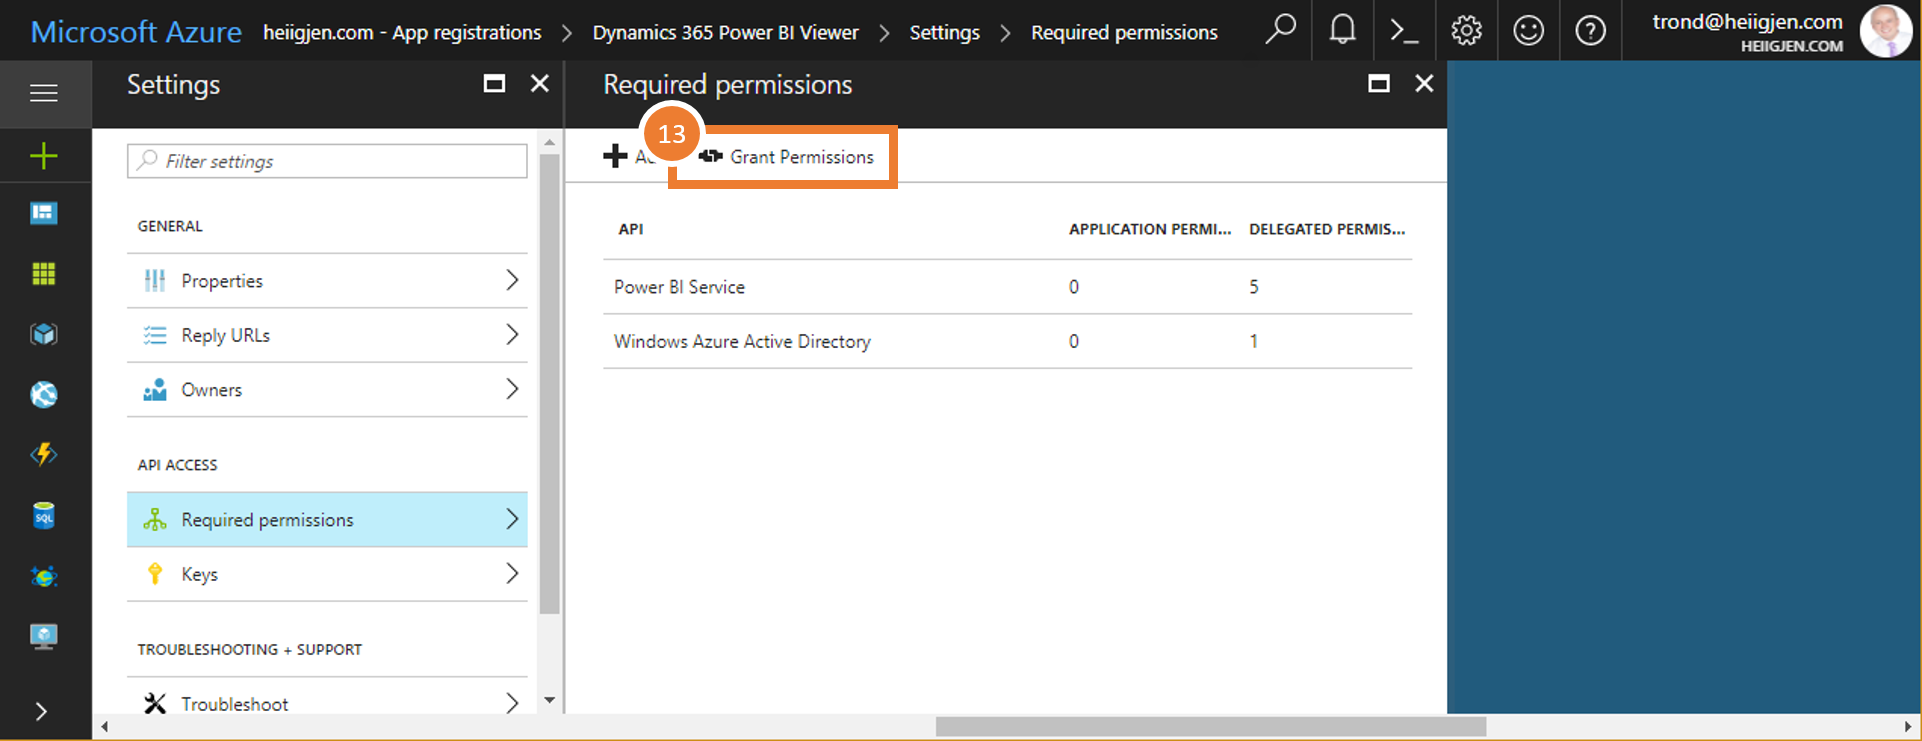
- Final step is to grant permissions to all users. Go to settings > Required permissions
-
Press Grant permissions
Next step is to install and configure crm-powerbi-viewer in Dynamics 365.