Azure AD
To be able to authenticate with Power BI a token is required. The token is delivered by Azure AD and to get it crm-powerbi-viewer must be registered as a valid application.
(new) Power BI Simplified Flow
The Power BI team has created a schema that simplifies the creation of an application in Azure AD. You still need to perform a few steps in the Azure portal but the flow is easier and with fewer steps. The guide on this page is the original one with all the steps taking place in Azure. The new guide using the Power BI schema can be found here.
If you encounter issues following the new flow - please validate the created application using the guide on this page.
Steps
- Go to the Azure portal at https://portal.azure.com.
- Navigate to your Active Directory.
- Then to App Registrations
-
Add new
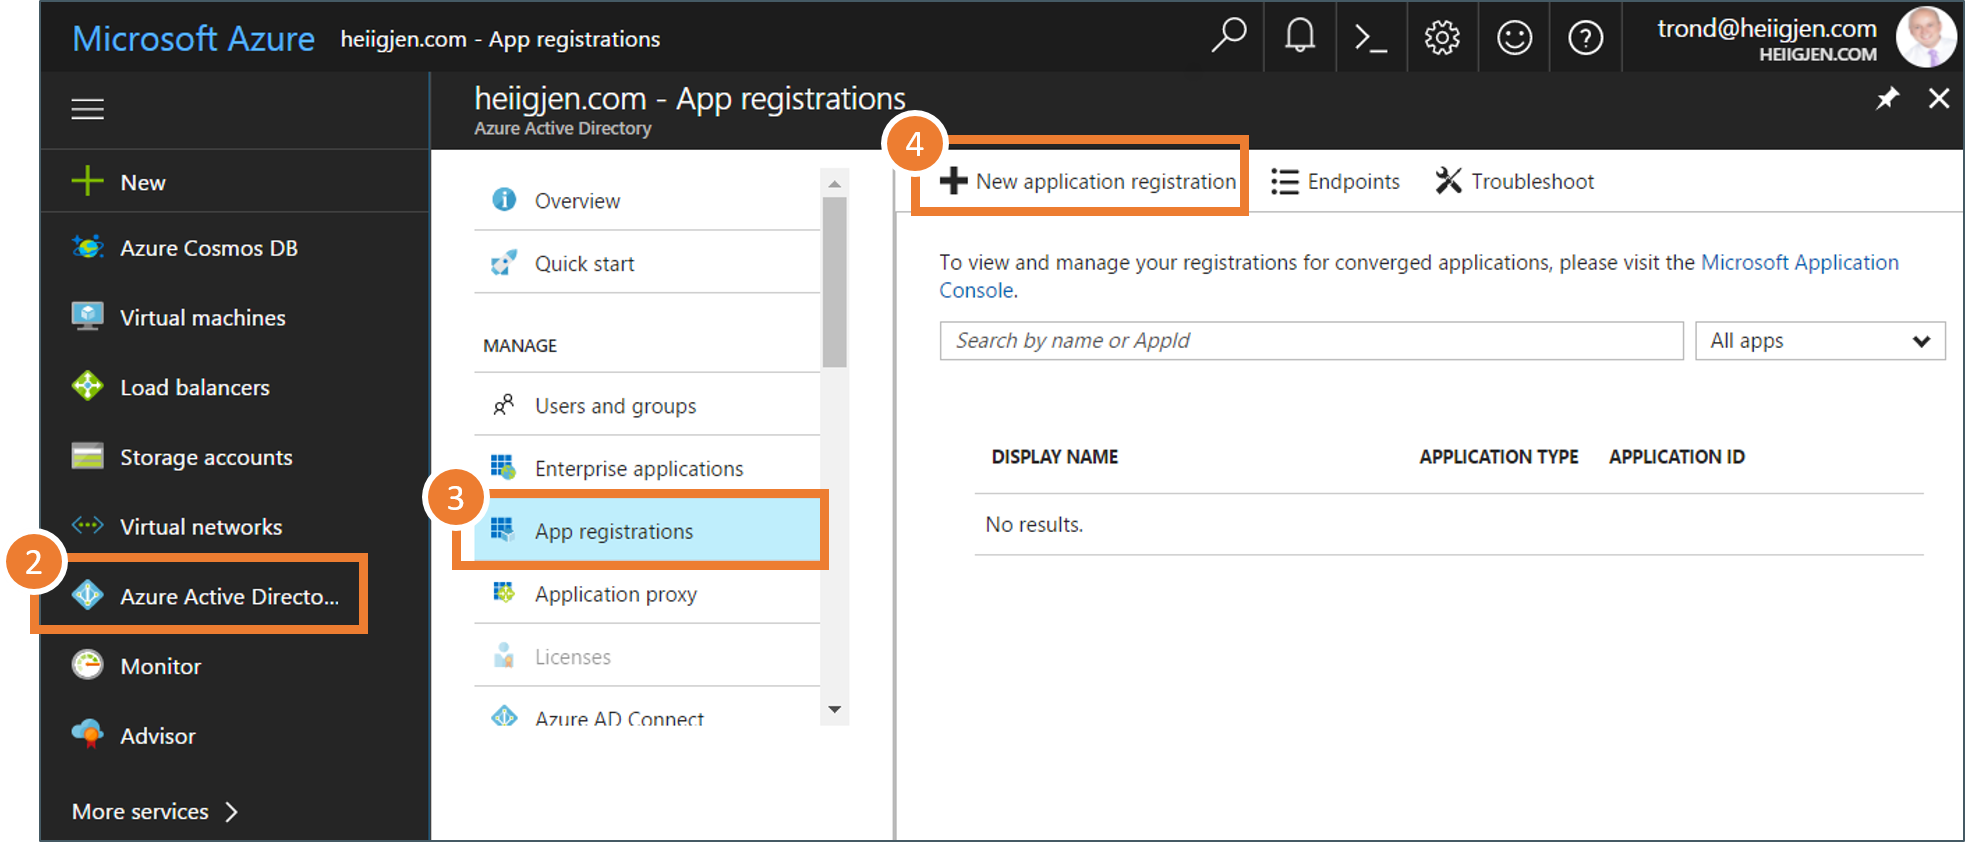
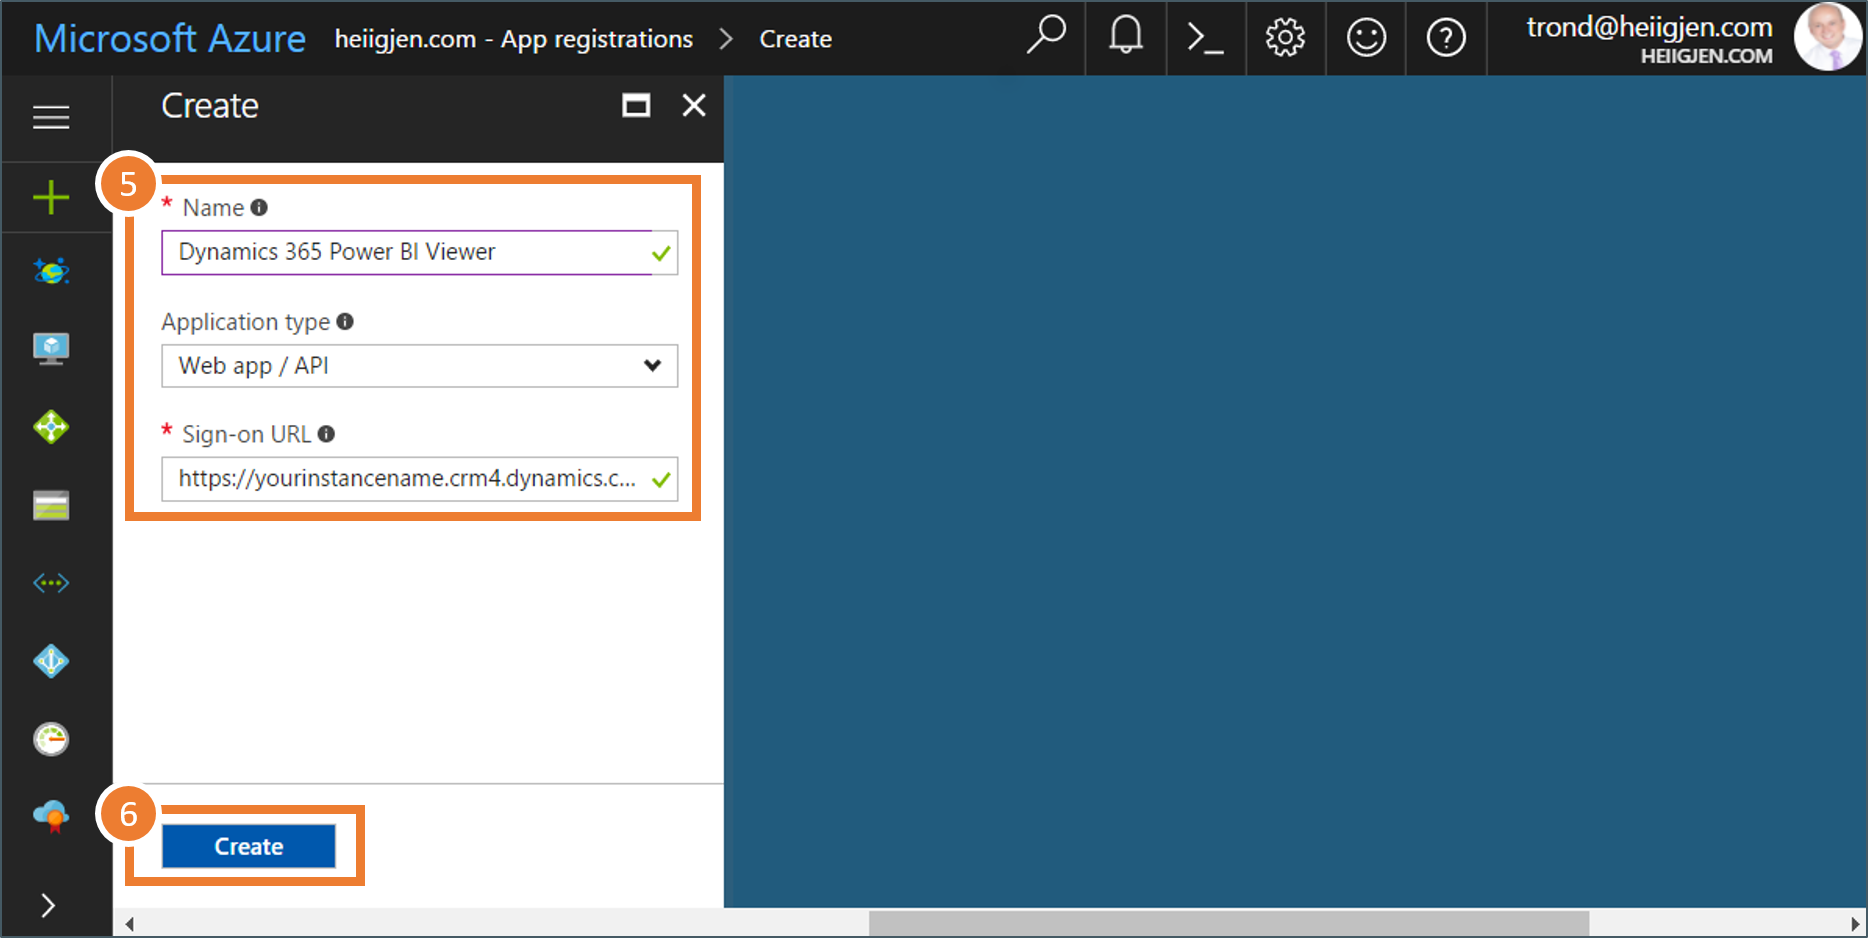
- Enter details. Name the application “Dynamics 365 Power BI Viewer”, set the type to “Web app / API”, and set sign-on url to the URL of your Dynamics CRM instance https://yourinstancename.crm?.dynamics.com/*
-
Create the app
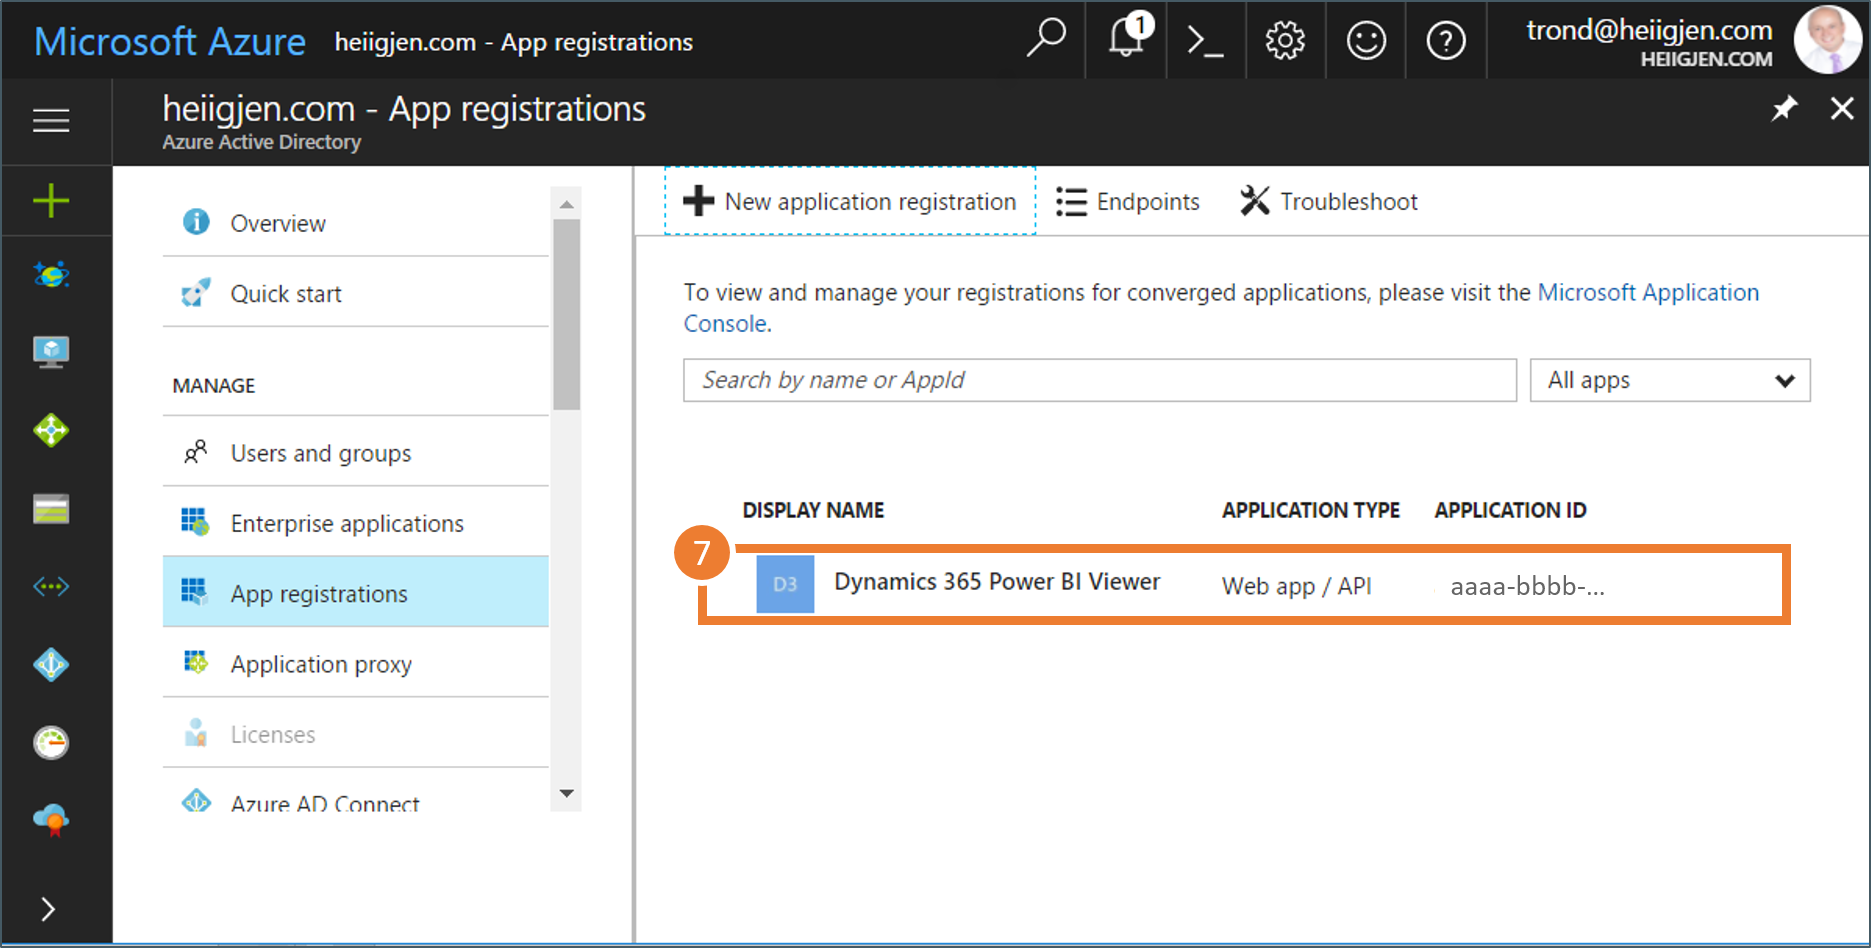
-
Open the newly created app
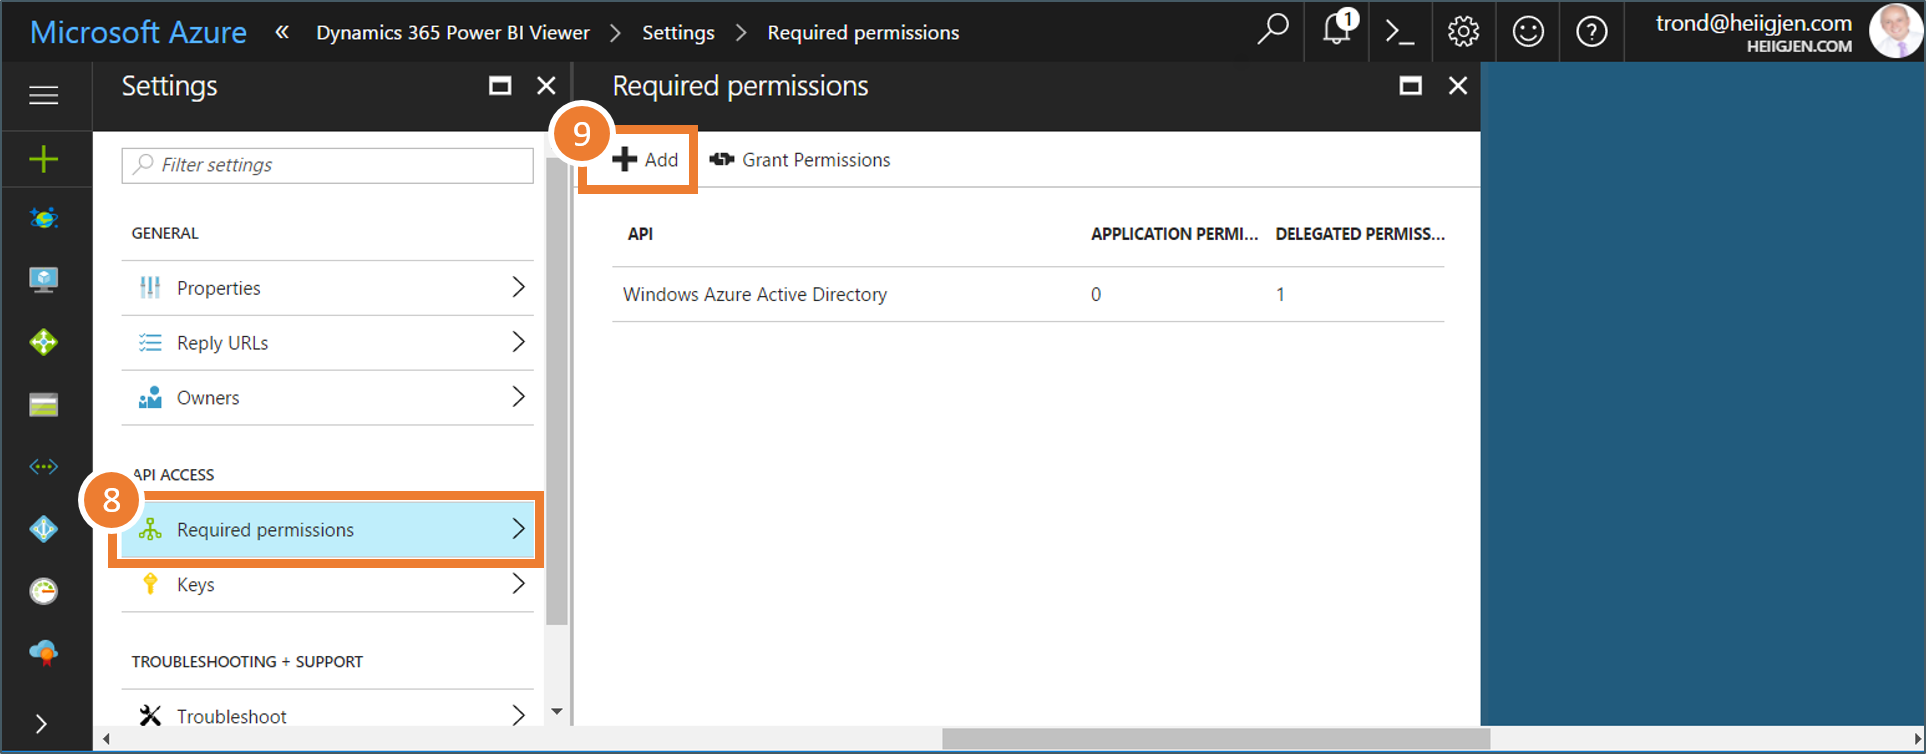
- The application needs access to Power BI. Go to required permissions, and …
-
add new
- Select API, and …
-
choose “Power BI Service”
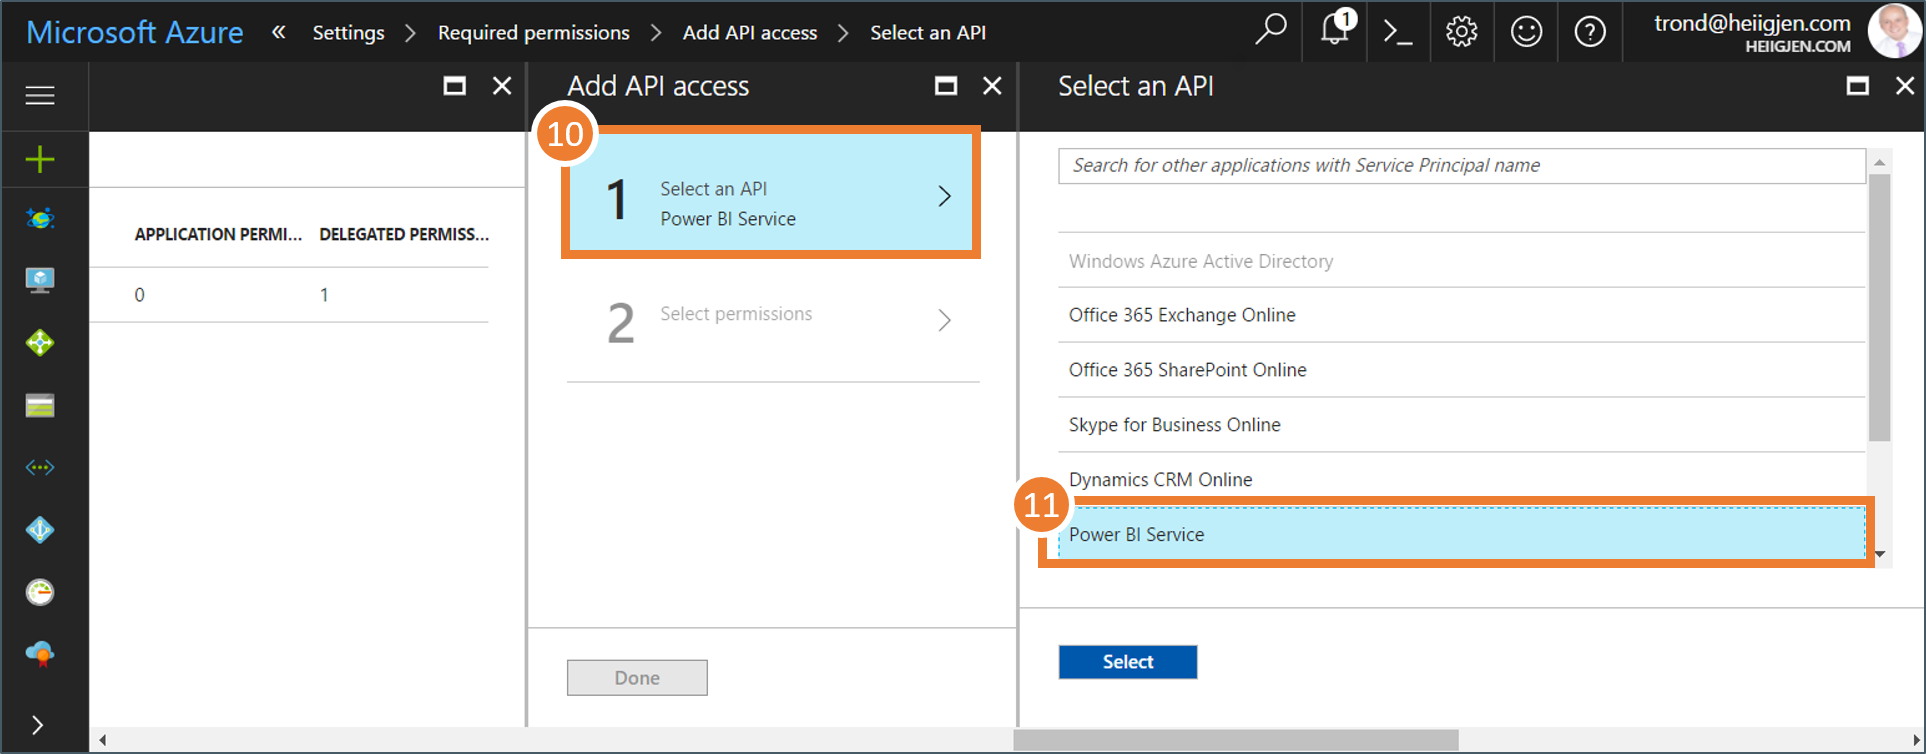
Can’t find the service? You remembered to create a report or dashboard in Power BI right? If not it might be that Power BI has not been associated with your environment. Login to Power BI before re-trying…
- Next step is setting Power BI permissions
-
What you need is rights to view.
The Power BI team is currently adjusting the list of permissions. The image below may not be up to date. Make sure you have view rights to everything.
If you encounter issues (e.g. 401), try to set all permissions not requiring admin. - Click select to set the new permissions…
-
and click done as that is what you are (almost)
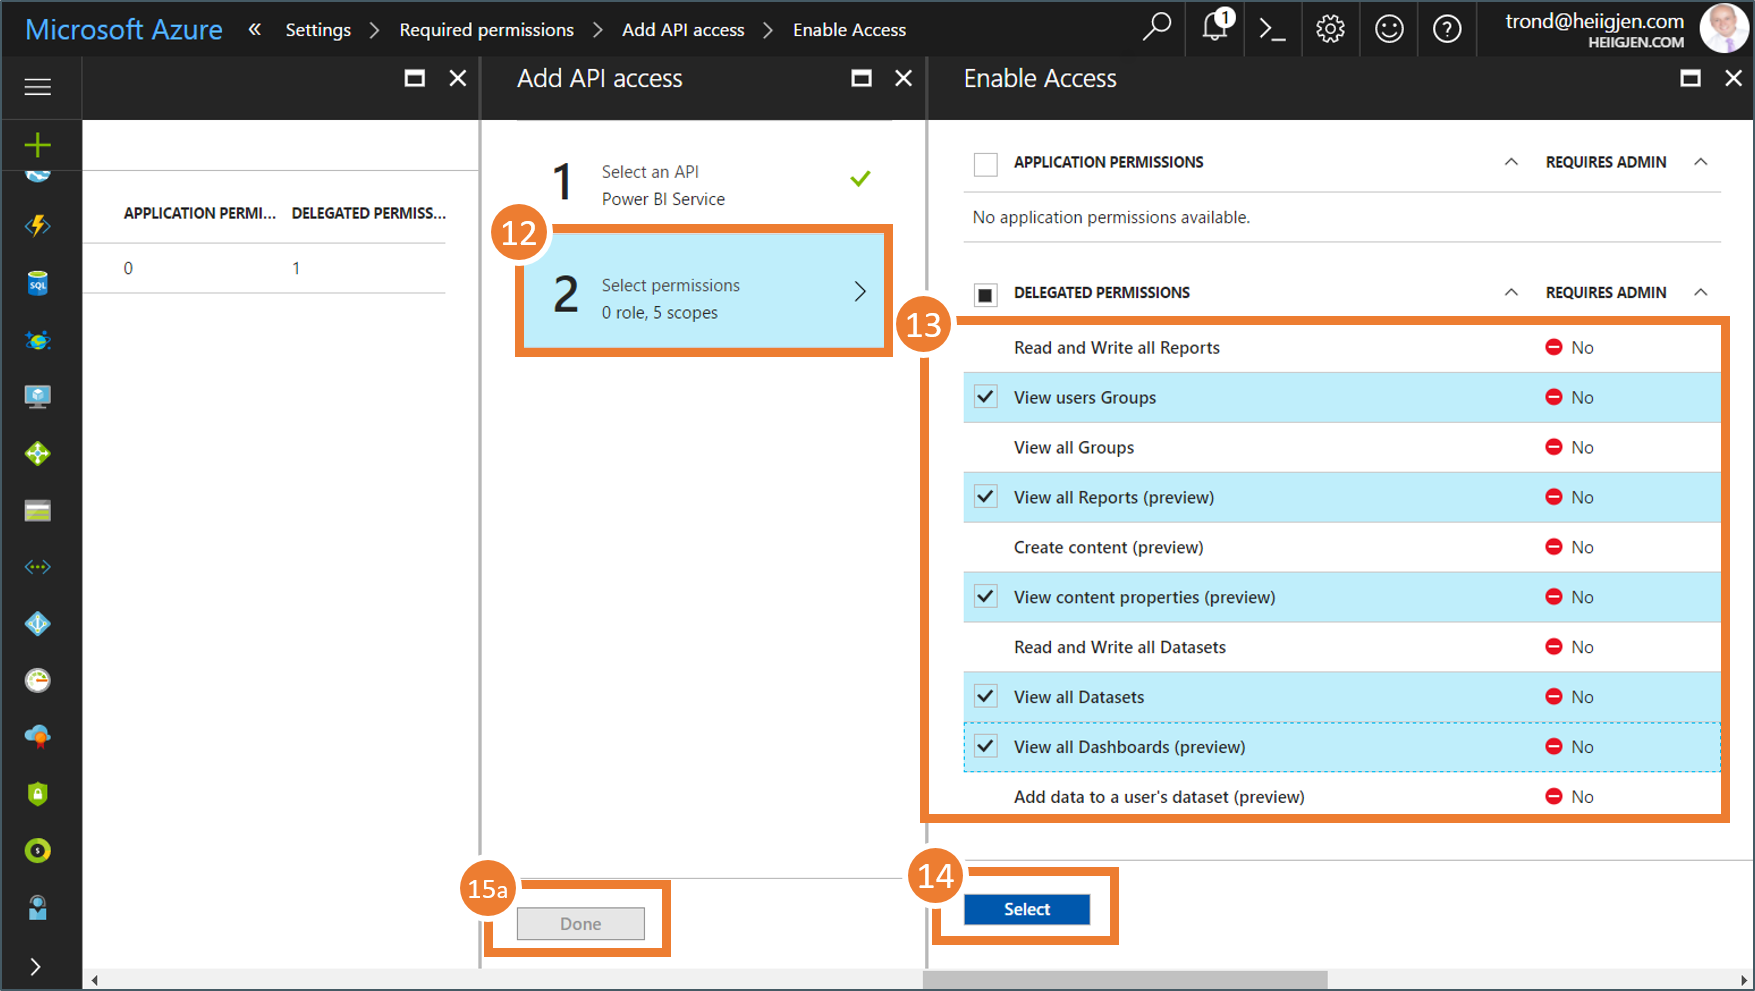
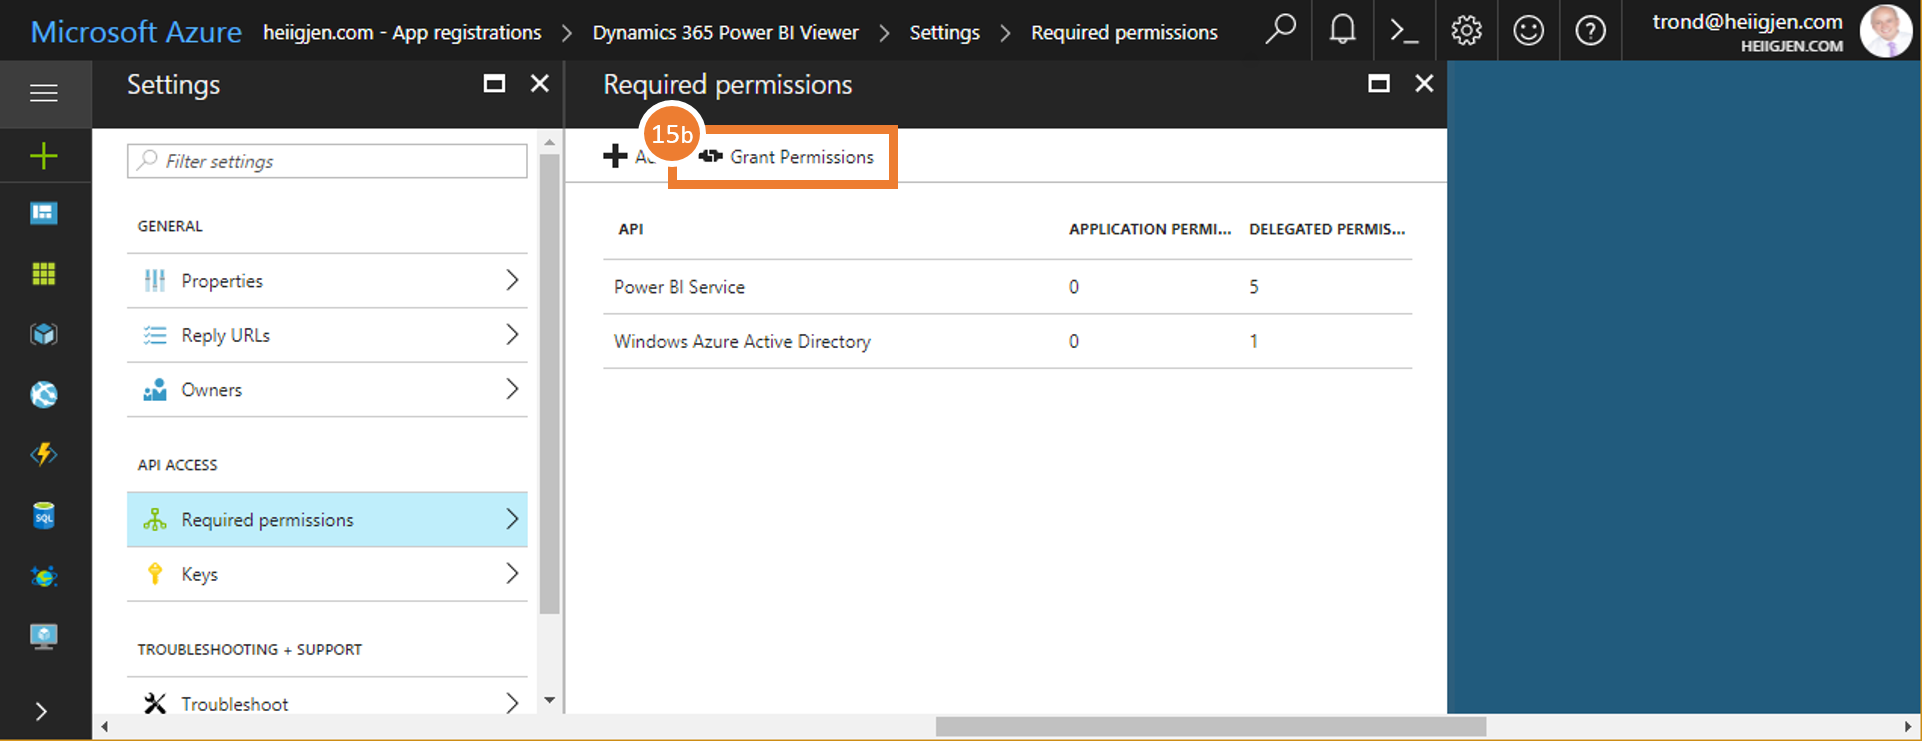
15b Grant Permissions. After setting permissions you need to grant them to all users. Press the button named “Grant Permissions” (see 15b).
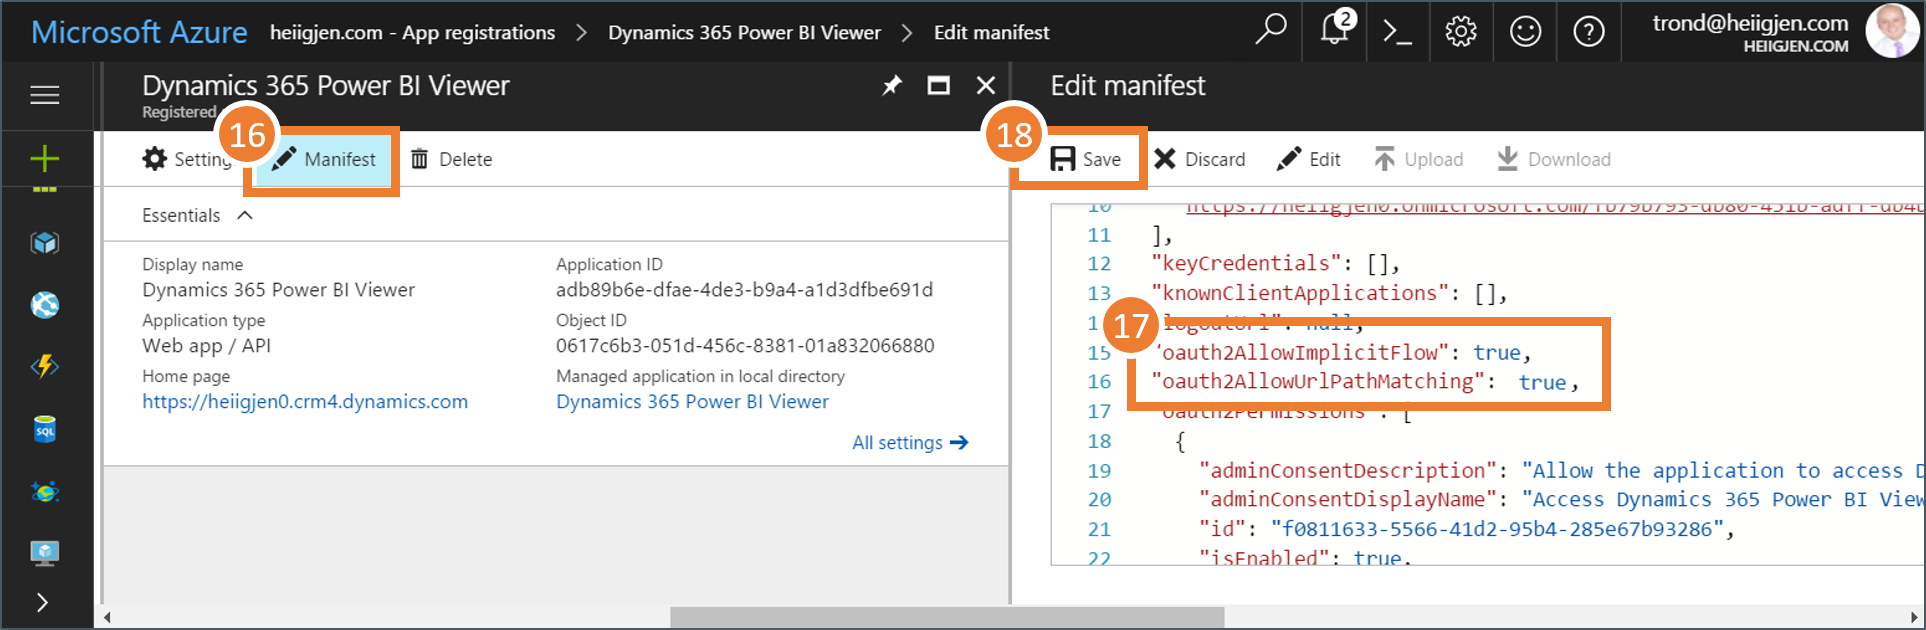
- Two changes to the manifest are required
-
Change the following from false to true:
"oauth2AllowImplicitFlow": true, "oauth2AllowUrlPathMatching": true, -
And save.
-
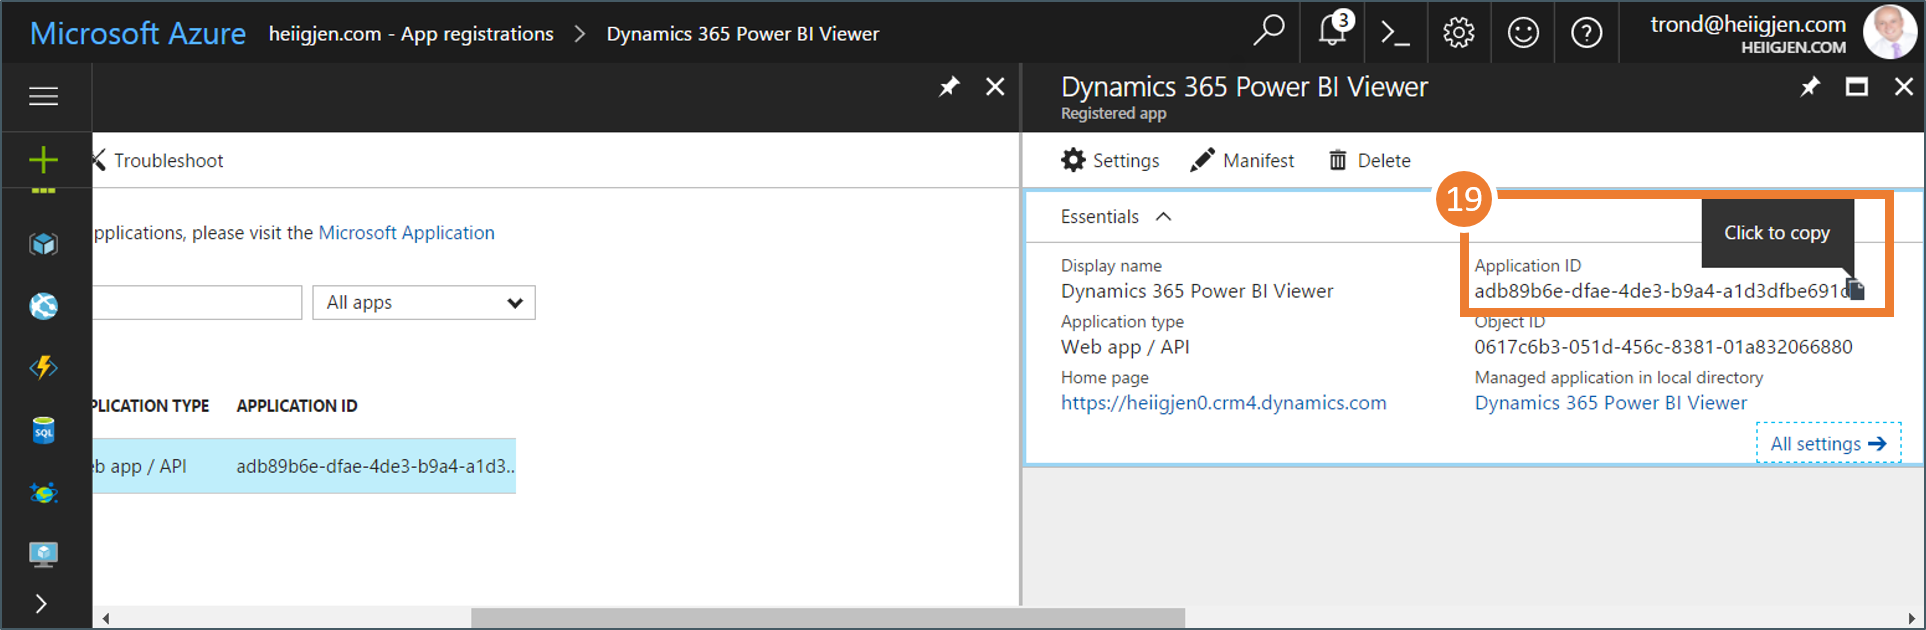
Finally copy the application id as this will be required when configuring the solution in Dynamics 365.
Next step is to install and configure crm-powerbi-viewer in Dynamics 365.